

Fixing Mechanical Sink Disposals
A mechanical sink disposal is a helpful kitchen appliance. It grinds food waste into small particles so they can be washed down the drain. This convenience saves time and reduces kitchen odors.
However like any mechanical device these units can experience problems. Issues might range from simple jams to more complex electrical or plumbing failures. Understanding how to approach these problems is very important for every homeowner.
I want to share practical steps for fixing mechanical sink disposals. These tips cover common problems you might face. We can often resolve many issues with basic tools and a bit of patience saving the cost of a service call.
The Essential Role of Mechanical Sink Disposals
Kitchen sink disposals are more than just a convenience. They play a significant role in modern kitchens by helping manage food waste. Instead of scraping leftovers into the trash where they might contribute to landfill waste and odors a disposal grinds them up.
This process sends the food particles into the wastewater system. It reduces the amount of organic material going into solid waste streams. This can be better for our environment in the long run. Many cities even encourage their use for this reason.
A well-maintained disposal also keeps your kitchen cleaner. It stops food scraps from building up in the sink or trash can. This helps prevent pests and keeps your home smelling fresh. It is a workhorse in the kitchen that we often take for granted until it stops working.
Understanding How Your Disposal Works
Most mechanical sink disposals use a spinning plate with impellers or shredder rings. These components force food waste against a stationary grind ring. The food is pulverized into tiny pieces. Water then flushes these particles down the drain.
The unit runs on an electric motor which is usually located under your sink. There is a strong motor that powers the grinding action. This motor needs proper care and a clear path to function effectively. Over time parts can wear out or become clogged because of improper use.
Knowing this basic operation helps when troubleshooting. You can better understand why a hum might occur without grinding. You can also figure out why leaks might happen at certain points. It all comes back to the mechanical and electrical parts working together.
Prioritizing Safety When Fixing Sink Disposals
Safety is the first and most important step when dealing with any appliance repair. Especially when it involves electricity and sharp moving parts like a sink disposal. Ignoring safety can lead to serious injury or damage to your home.
I always start by cutting the power. This is not optional it is absolutely critical. You must turn off the circuit breaker that supplies power to your kitchen sink area. Do not just flip the wall switch. A wall switch might only control part of the unit or accidentally be turned on by someone else.
Make sure to pull out the main fuse or flip the circuit breaker. This ensures no electrical current can reach the disposal unit while you are working on it. This simple step protects you from electric shock. It also prevents the motor from accidentally activating.
Essential Tools and Preparations
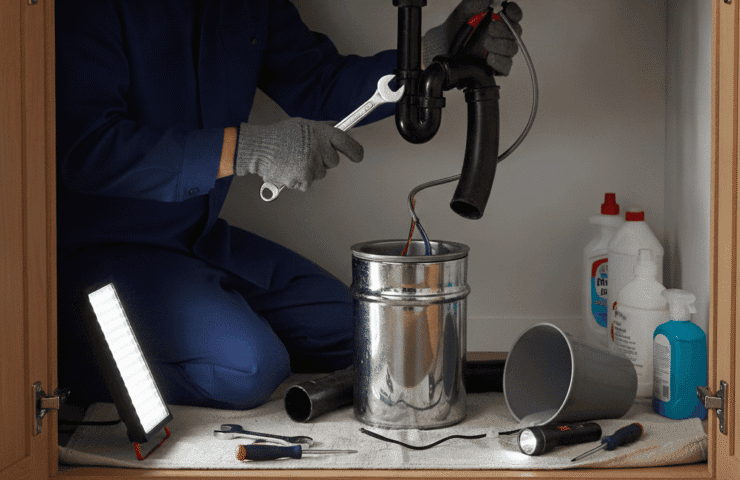
Before you begin gathering your tools is a smart move. You will likely need a flashlight to see into the dark cabinet under the sink. Pliers are useful for gripping and twisting. An Allen wrench is often required for the reset button or clearing jams. Many disposals come with their own specific Allen wrench for this purpose.
I also recommend having a bucket or shallow pan ready. Disposals can hold water or drain food particles. A bucket catches any spills or leaks keeping your cabinet dry. Gloves are also a good idea to protect your hands from grime and sharp edges.
Always clear the area around the sink and under it. This gives you plenty of room to work safely and comfortably. Good lighting is also very helpful. Never stick your hand down the drain or into the disposal without confirming the power is off at the breaker. Even then it is best to use a tool to clear any obstruction.
Dealing With a Jammed Garbage Disposal
A jammed garbage disposal is one of the most common issues. It usually makes a humming sound but the grinding plates do not move. This happens when a hard object or too much food waste gets stuck in the mechanism. It stops the impellers from rotating.
The first step as I said is always safety. Turn off the power at the circuit breaker. This protects you from accidental starts. Trying to clear a jam with power on is extremely dangerous. I always double-check that the power is off.
Look into the drain opening with a flashlight. You might see the item causing the jam. Often it is a bone a fruit pit or a piece of silverware. Never use your hand to remove the item. Instead use pliers or tongs to carefully pull out the obstruction. This keeps your fingers safe from harm.
Using the Reset Button and Allen Wrench
If you cannot see or reach the obstruction there is another method. Most disposals have a small red reset button on the bottom of the unit. Push this button firmly. Sometimes this is enough to clear a minor internal blockage. It resets the thermal overload protector.
If the reset button does not work locate the hexagonal hole in the center of the disposal’s bottom. Insert the special Allen wrench that came with your disposal. If you do not have it a 1/4-inch Allen wrench usually fits. Turn the wrench back and forth vigorously. This manually rotates the grinding plates freeing them from the jam.
I have found this method to be very effective for stubborn jams. Once the wrench turns freely remove it. Then push the reset button again. Restore power at the circuit breaker and test the disposal with cold water. It should now operate normally. If it still hums or does not turn you might have a more complex problem.
Troubleshooting a Hum but No Grinding Issue
A humming disposal that does not grind is usually jammed. We covered clearing jams but sometimes the issue is slightly different. The motor tries to run but cannot rotate the grinding elements. This means something is preventing the flywheel from spinning.
After ensuring the power is off at the breaker I inspect the drain. I look for any visible objects that might be stuck. Sometimes a small piece of metal or a very hard item gets wedged under the impellers. Using a flashlight can help you see clearly into the chamber.
If no obvious obstruction is found I use the Allen wrench method. Insert the wrench into the center hole on the bottom of the disposal. Turn it back and forth several times. You should feel it loosening up. This action often dislodges whatever is binding the motor.
When the Motor Overheats
The humming sound indicates the motor is receiving power. However it cannot move. This causes the motor to heat up quickly. Most disposals have a thermal overload protector which trips when the motor gets too hot. This is a safety feature to prevent damage to the motor.
When the protector trips the disposal stops working entirely. It will not hum or do anything until it cools down and is reset. This is where the red reset button on the bottom of the unit comes in. Press it firmly after the motor has cooled for a few minutes. It clicks back into place.
If the disposal hums again and then immediately trips the reset button there is still a jam. The motor cannot overcome the resistance. Continue using the Allen wrench to manually free the impellers. Persistent tripping means the obstruction is still there or the motor is failing. In those cases further investigation or professional help may be needed.
Addressing Leaks and Drips From Your Disposal Unit
Leaky sink disposals are messy and can lead to water damage under your sink. It is important to find the source of the leak quickly. The location of the leak tells you a lot about the problem. I always check the power first and drain the water before looking for leaks.
First make sure the power is off at the circuit breaker. Place a bucket or a towel under the disposal to catch any drips. Then carefully inspect the entire unit. Most leaks happen at connection points. These areas include the sink flange the dishwasher drain hose connection or the discharge pipe connection.
A common leak source is the sink flange. This is the part that connects the disposal to the sink drain opening. Over time the putty seal or gasket around the flange can deteriorate. Tightening the mounting bolts or replacing the plumber’s putty often fixes this kind of leak. It requires some disassembling but is a straightforward repair.
Common Leak Locations and Fixes
Leaks can also come from the dishwasher drain hose connection. This hose usually connects to the side of the disposal unit. Make sure the clamp is tight and the connection is secure. If the hose itself is cracked or brittle it needs replacing. A new hose and clamp are simple to install.
Another area to check is the discharge pipe. This pipe carries the ground-up waste from the disposal to the main drain. The pipe connects to the side of the disposal with a gasket and mounting bolts. Loose bolts or a worn-out gasket can cause a leak here. Tighten the bolts or replace the gasket if necessary. Sometimes cracks in the disposal housing itself can cause leaks but these are less common and often mean a full replacement is needed.
I also inspect the rubber gasket where the disposal connects to the drainpipe. This gasket can dry out or crack causing water to seep through. Replacing this gasket is usually simple. You can find replacement parts at most hardware stores. Be sure to use a good quality sealant during reassembly for a watertight fit.
Preventative Steps for a Healthy Sink Disposal
Preventative maintenance is the best way to avoid most disposal issues. Taking a few simple steps can extend the life of your unit and keep it running smoothly. I always advise homeowners to be mindful of what goes down the drain. This is the most crucial part of disposal care.
Never put hard items like bones fruit pits or metal objects into the disposal. Avoid fibrous foods such as celery corn husks or artichokes. These items can wrap around the impellers and cause jams. Also do not put grease or cooking oil down the disposal. Grease solidifies in pipes and causes clogs. It is better to dispose of grease in the trash.
Run cold water before during and for about 30 seconds after using the disposal. Cold water helps solidify grease and food particles making them easier to grind and flush away. The extra water also helps clear the drain lines. This prevents food buildup in the pipes.
Cleaning and Maintaining Your Disposal
Regular cleaning is also very important. Grind a tray of ice cubes occasionally. The ice helps to clean the grinding components and sharpen the impellers. You can also add a handful of citrus peels like lemon or orange rinds to the disposal. These not only clean the unit but also leave a fresh scent.
I also recommend a simple baking soda and vinegar treatment every few weeks. Pour half a cup of baking soda into the disposal. Then follow with a cup of white vinegar. Let it sit for about 10-15 minutes. This mixture creates a fizzing action that cleans and deodorizes the drain. After the wait flush with hot water.
Always check the splash guard. This rubber ring prevents food from splashing back up. If it becomes torn or worn it can reduce the disposal’s efficiency and cause noise. Replacing a splash guard is a quick and inexpensive fix. These simple habits keep your disposal in top shape for years.
Knowing When to Seek Professional Help
While many disposal problems can be fixed by a homeowner some issues require a professional. Recognizing these situations can save you time and prevent further damage. I always tell people when you are unsure or uncomfortable with a repair it is best to call an expert.
Persistent leaks are a good example. If you have tried tightening connections and replacing gaskets but the leak continues it is time for a plumber. A persistent leak might indicate a crack in the disposal housing itself. It could also point to a more complex plumbing issue further down the drain line. Water damage can be very expensive to fix so addressing leaks quickly is important.
Another sign for professional intervention is a unit that does not respond to troubleshooting. If your disposal hums but remains jammed even after using the Allen wrench or if it makes no sound at all and the reset button does not work the motor might be burned out. Replacing a motor or the entire unit is a job best left to someone with experience. Sometimes homeowners wonder do plumbers fix garbage disposals and the answer is yes they are well-equipped to handle these repairs and installations.
Complex Electrical or Plumbing Concerns
Electrical issues beyond a simple reset button are also a reason to call a professional. If your disposal is not getting power and the circuit breaker is not tripped there could be a wiring problem. Working with electrical systems can be dangerous if you do not have the proper training. An electrician or a licensed plumber with electrical experience should handle this.
Major clogs in the main drain line are another issue for experts. If your sink backs up even when the disposal is off the problem might be deeper in your plumbing system. Disposals only handle the food waste at the sink. A clog further down needs professional tools like a snake or hydro-jetting to clear it. Trying to force a deep clog yourself can make it worse and damage your pipes.
We see situations where repeated repairs are needed. If your disposal jams frequently or constantly trips the reset button it might be nearing the end of its life. A professional can assess its condition and recommend whether repair or replacement is the more economical option. They have the expertise to diagnose underlying problems you might miss.
Mastering Mechanical Sink Disposals for Long-Term Function
Understanding and maintaining your mechanical sink disposal means you can enjoy its benefits for many years. We have explored common issues from stubborn jams to annoying leaks. We have also covered how to tackle these problems safely and effectively with basic tools. The key is always to approach these tasks with caution and a clear plan.
I have shown how important it is to disconnect power before any work begins. This simple step keeps you safe. We also looked at clearing jams with an Allen wrench. We talked about resetting the thermal overload button for humming disposals. Understanding where leaks commonly occur and how to seal them can save you from bigger problems. Preventative care like using cold water and avoiding problematic foods is the best strategy. Regular cleaning with ice and citrus peels keeps the unit fresh and efficient.
Remember that while many issues are DIY-friendly some situations require a professional plumber. Do not hesitate to call for help with persistent leaks electrical problems or deep drain clogs. Taking proactive steps and knowing when to call an expert will ensure your disposal runs efficiently. It will also help keep your kitchen clean and your plumbing system healthy. Keep these tips in mind and your mechanical sink disposal will be a reliable kitchen ally.


